SSTP VPN Setup for Windows 11
Setting Up SSTP VPN on Windows 11
1. Open Windows Settings- Click on the Start menu or press the Windows key
- Click on Settings (gear icon)
Windows 11 Network & Internet Settings
 2. Navigate to VPN Settings
- In the Settings window, click on "Network & Internet" from the left sidebar
- Scroll down and click on "VPN"
Windows 11 Network & Internet Settings
3. Add a New VPN Connection- Click on the "Add VPN" button
Adding SSTP VPN Connection in Windows 11
4. Configure the VPN Connection- For VPN provider: Select "Windows (built-in)"
- Connection name: Enter a name for your VPN connection
- Server name or address: Enter the server address provided by your VPN service
- VPN type: Select "Secure Socket Tunneling Protocol (SSTP)"
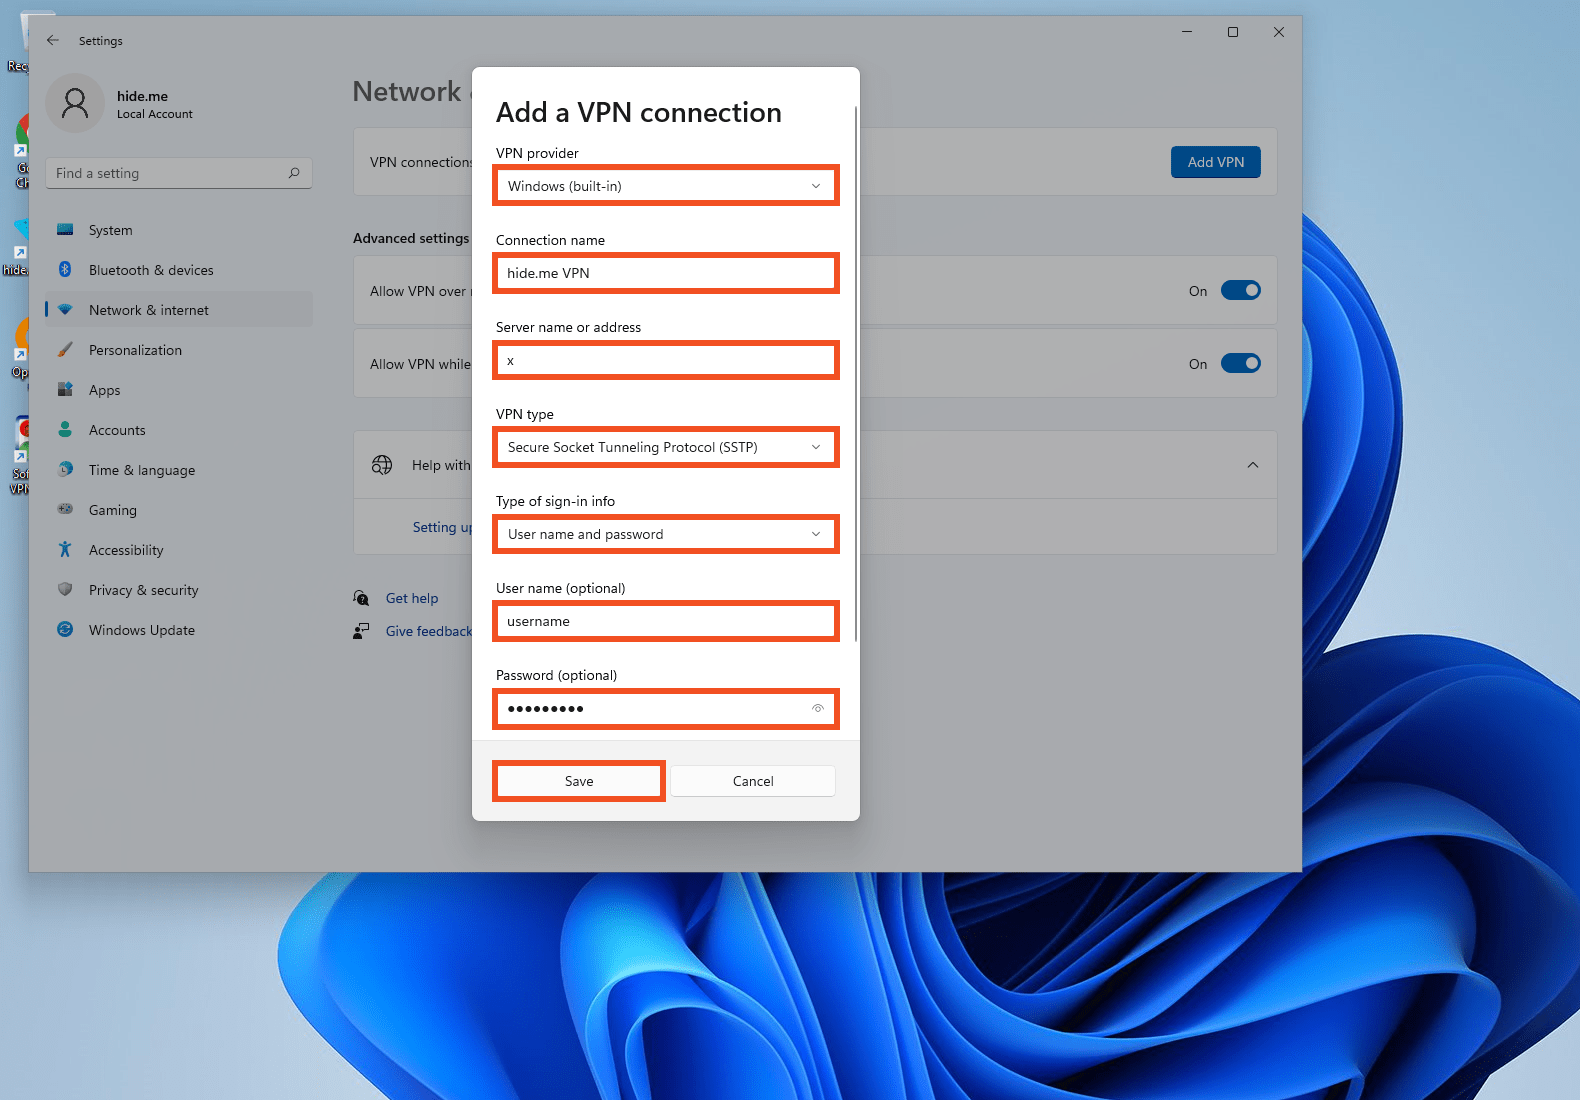

- Type of sign-in info: Select "Username and password"
- Username: Enter your VPN username
- Password: Enter your VPN password
- Click "Save"
Adding SSTP VPN Connection in Windows 11
5. Connect to the VPN- Find your newly created VPN connection in the list
- Click the "Connect" button
VPN Connection in Windows 11
6. Verify Connection- When connected, you'll see "Connected" under your VPN connection name
- A VPN icon will appear in the system tray
VPN Connection in Windows 11
7. Disconnect from the VPN (When Needed)- Go back to VPN settings
- Click "Disconnect" next to your VPN connection
VPN Connection in Windows 11